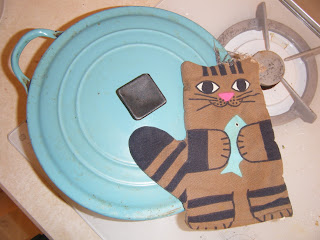
Just last week I discovered this adorable cat-shaped oven mitt lurking in the kitchen cupboard. As it seems a bit old and rather small, I thought it might be fun to reuse it by turning it into a dog toy. It sure beats buying an overpriced one from a store!
I (Sara) live with my boyfriend, his young son and the boy's grandmother. There are four cats and a dog who live with us, so we try to keep them occupied. Lady, the Cocker Spaniel, is in desperate need of a new toy, so I collected a few items from around the house to make her one; a sewing needle, unflavored dental floss (it's more durable than plain thread), batting for stuffed animals, and a replacement toy squeaker.
I realize many of you may not have all of these items lying around, I just happen to live in a cluttered, crafty home. If you need to purchase batting I would suggest looking for some organic cotton, simply because most batting is made of non-recyclable synthetic polyester. I've also heard of filling an old prescription bottle with beans to make noise. The safety lid will secure the beans from falling out, and you'll be reusing something else!
I firmly believe that our companion animals deserve to lead happy healthy lives, so we should take special care when we purchase or make items they will be chewing on or consuming. Understanding what a toy or treat is comprised of can help us avoid hazardous situations like choking or allergic reactions. No matter what, we should always keep an eye on our pets when they play with their toys to ensure their safety and our sanity.
As you can imagine this project is very easy. Simply take some stuffing and shove it towards the end of the oven mitt, filling it about halfway. Then place the squeaker inside, followed by more batting. Now knot the dental floss and thread it through the needle. Stitch up the opening by piercing through both layers, weaving back and forth. I find it easy to just follow the seam. When you're finished the bottom should look like a sealed zip-loc bag. I decided stitching overtop would leave the floss exposed and it could catch on the dog's teeth, tearing open the bottom. We want this toy to last a while though.
Voila! I've now turned an old oven mitt into a new dog toy for next to nothing. See how Lady likes it?
Have you ever tried to make a toy or treat for your pet? Share your ideas or let us know what you think of this one!
By: Sara Moline


